
 Forum
Forum
These days many of Garmin’s new GPS receivers contain built in maps, from the nuvi series with road maps to the Colorado and Oregon with topos. These receivers can still have maps loaded to them though in addition to the maps that already exist. This how-to will detail how to load additional maps to your GPS unit with either a Mac or a PC.
- PC: Use MapSource To Load Maps
- PC: Use BaseCamp To Load Maps
- Mac: Use MapInstall To Load Maps
Warning: [color="sienna"]If you bought a micro-SD card that contains maps from Garmin DO NOT overwrite this card, use another card.[/color]
[SIZE="3"]Loading The Maps With MapSource on a PC[/size]
1. Open Garmin MapSource (all screenshots from version 6.14.X but the process is similar for all versions)
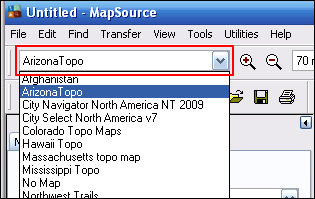
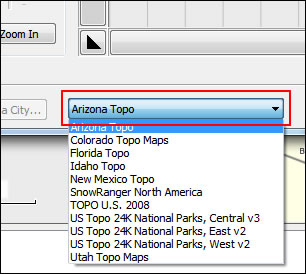
2. Select the map you want to load from the drop down menu in the upper left corner.
If the map you want is didn't include an installer follow this tutorial first and then continue to step 3.
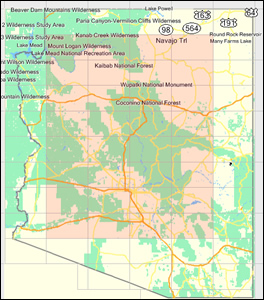
3. Once the map is select let it load in the main window.
4. Zoom to an appropriate level so you can see what parts you want to load (if you do not want to zoom all the way out you can select what is on screen and then easily move to another part of the map and select those areas as well).

5. Click the “Map Tool” button

6. Select the segments you want to load by dragging selection boxes on the map.
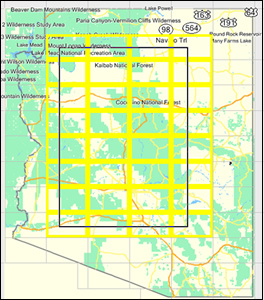
7. The selected areas will then turn pink:
and appear in the maps tab on the left side of the screen (at the bottom of this area you can see how many segments you’ve selected and how large they are).
8. Repeat steps 2 through 7 for any other maps you want to load at the same time (such as a Topo map and City Navigator and another topo map).
9. Now plug your GPS in to the computer or put the memory card from the GPS (or the one you will use on the GPS) into your card reader.
10. Now click the “Send to Device” button

11. On the next screen you should see your device (make sure it’s the proper device; here I am loading to my microSD card). Also, make sure the maps checkbox is checked.
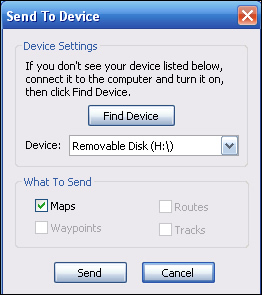
12. Click “Send”
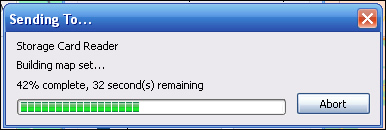
13. First it will build the mapset (could take many hours depending on the maps):
then it will transfer it to the card/GPS:
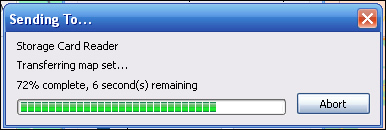
14. You will get a success message at the end similar to: “The data has been successfully sent”
Once you have the maps on the GPS you can follow this tutorial to show how to hide and show different maps.
[SIZE="3"]Loading The Maps With BaseCamp on a PC[/size]
1. Open Garmin BaseCamp (all screenshots from version 2.0.9)
Note: You'll need version 2.0.9 or higher to load custom maps.
2. Plug in the device you would like to load the maps to (a microSD card, SD card, or the actual GPS unit)
For this tutorial I will be using a Garmin Dakota 20 with memory card installed in the GPS; using a card reader will allow for faster map installs.
3. The device/card should appear on the left side as shown:

4. Right click on either the card or device and select "Install Maps"
5. MapInstall should now be running; click Next
6. Select the map you want to load at the bottom:
7. Now highlight the segments you want to load to the unit/card by dragging a selection box around the map displayed in the preview pane. Selected segments will turn pink.
8. Now at the bottom select another map that you want to load to the GPS. Repeart step 7 for all the maps you want to load.
9. Once you have finished selected all the maps you want to load hit next.
Note: Each time you load maps to the GPS it will erase all maps on the GPS except for the basemap (Navigation map on the Nuvi).
10. Press "Finish" and it will build your maps and transfer them to your card/unit.
11. You will get a success message at the end similar to: “The data has been successfully sent”
Once you have the maps on the GPS you can follow this tutorial to show how to hide and show different maps.
[SIZE="3"]Loading The Maps With A Mac[/size]
1. Download and install [Please Register or Login to download file]
2. First off, plug your GPS into your Macintosh and have it turned on. MapInstall will not make it past the second page unless you do this or if you are installing to a card reader, you will want it plugged in and the card mounted.
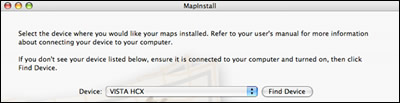
3. Open up the MapInstall application. You will get this splash page:
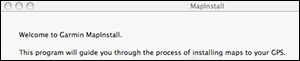
Click continue
4. Select your GPS or card reader and click Continue
5. If you see a screen like the one below you might want to check that you have the correct data card in the reader before you wipe out anything you might need later:

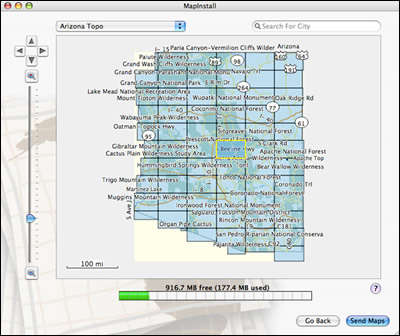
6. In the upper left of the window you should see a pull down menu where you select the map set you want. In this example, we have chosen Arizona Topo:

7. You can click on tiles to select them or marquee a selection; here I have selected the complete map. At the bottom of the window shows how much memory you have available and also what you have used. If you want to add maps from another map set, just select the other map set from the pull down menu and add them as above. When you are finished, select the Send Maps button.
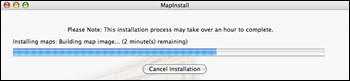
8. MapInstall will combine all the maps into one gmapsupp.img file to send to your GPS. This could take a while, depending on the size of the maps and the speed of your computer.
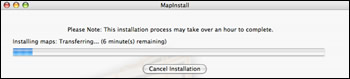
9. Once the gmapsupp.img file has been compiled, MapInstall will send it to your GPS or card reader.
Congratulations, you have now loaded the maps to your GPS unit. If you have multiple maps loaded onto your device use the internal menus to select which map to actively view.


